 Pin It
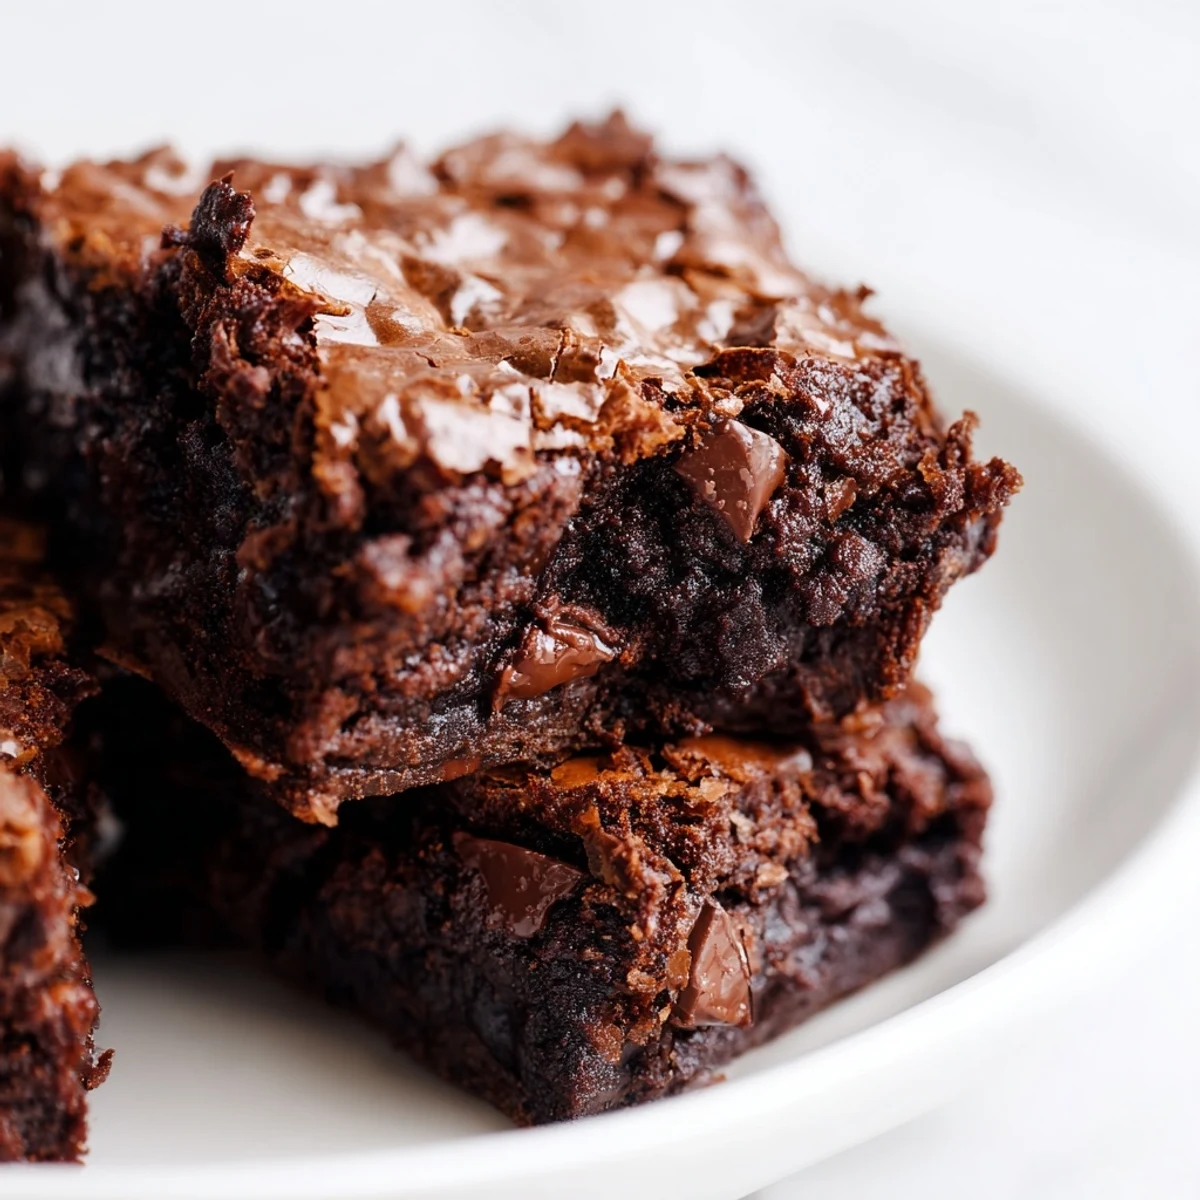
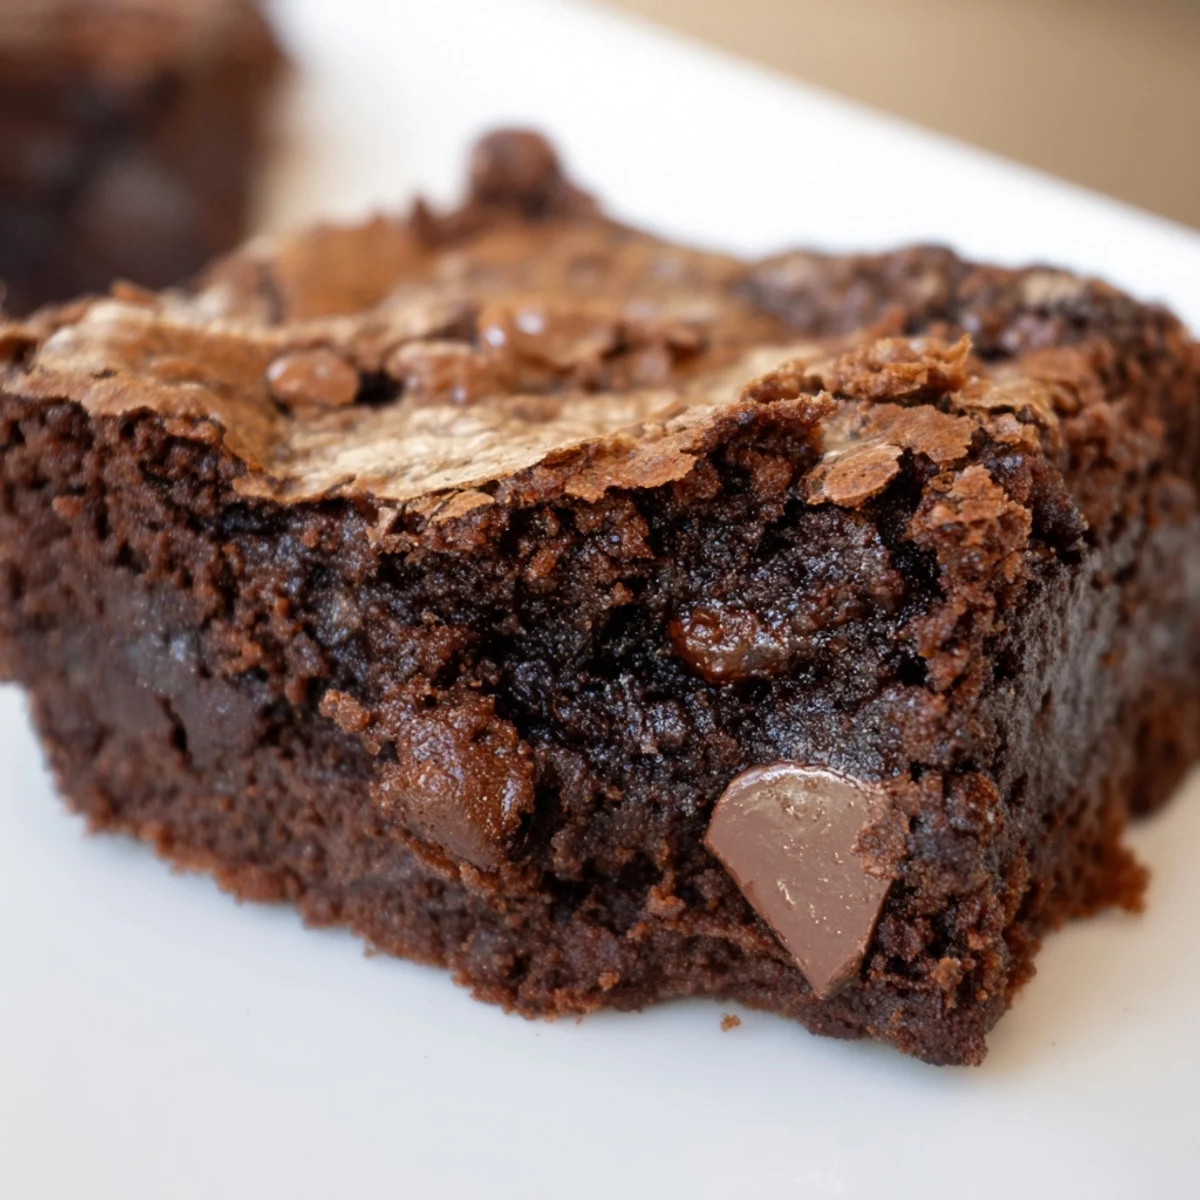
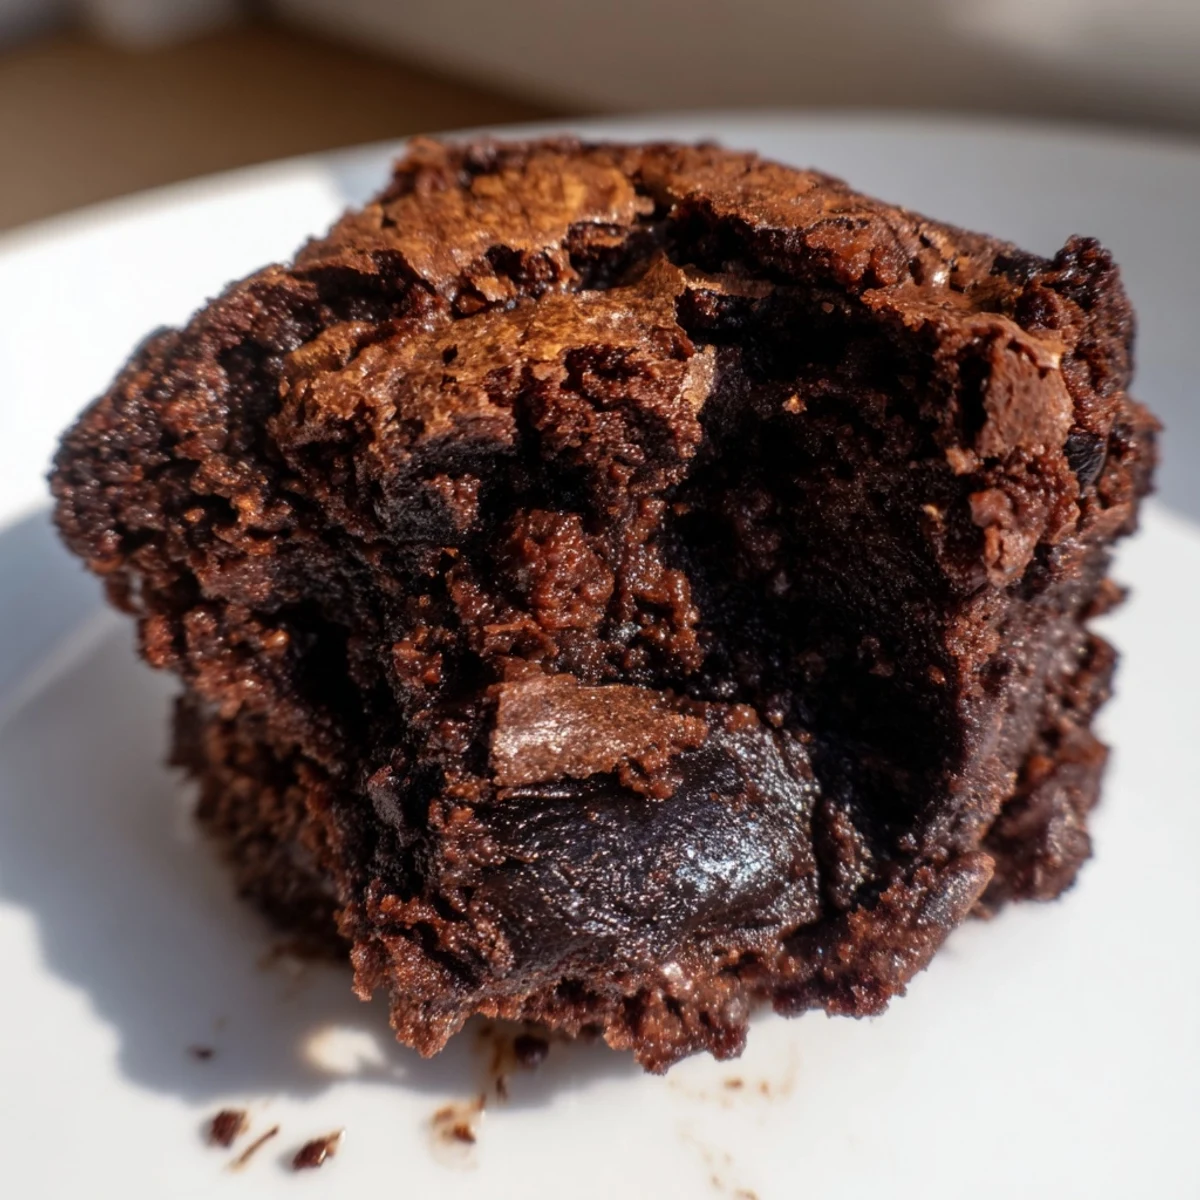
 These chocolate bites offer a satisfyingly rich and fudgy texture with a crackly top and a soft, melt-in-your-mouth center. Crafted with cocoa powder, melted butter, and semi-sweet chocolate pieces, the batter balances sweetness and chocolate depth. Baked in mini muffin cups for perfect bite-sized portions, they cool to a tender finish that pairs wonderfully with nuts or a dusting of powdered sugar. Ideal for quick preparation and easy serving at gatherings or as a sweet treat.
I made these brownie bites one afternoon when my sister texted that she was stopping by with her kids, and I had maybe twenty minutes to pull together something that felt homemade. I'd been craving chocolate anyway, so I grabbed what I had in the pantry and somehow ended up with these perfect little fudgy pockets that came out of the oven still warm and crackly on top. They've been my go-to ever since—simple enough to throw together on a Tuesday, but impressive enough that people ask for the recipe.
There's something about pulling a warm tray of these from the oven that makes a kitchen smell like a proper bakery, even though you've barely invested any real effort. My neighbor came over for coffee one morning while they were cooling, and the smell alone had her asking if I'd been baking professionally. I handed her three warm ones wrapped in a napkin, and she came back the next week asking me to teach her.
Ingredients
- All-purpose flour (3/4 cup): Use the spoon-and-level method rather than scooping straight from the bag to avoid packing down the flour, which can make the bites dense instead of tender.
- Unsweetened cocoa powder (1/4 cup): This is where the chocolate flavor lives—don't skip it or substitute with hot cocoa mix, which contains added sugar and won't taste quite right.
- Baking powder (1/2 tsp): Just enough to help them rise slightly and get that crackly top, but not so much that they become cake-like.
- Salt (1/4 tsp): A small pinch that makes the chocolate flavor sing without making anything taste salty.
- Unsalted butter, melted (1/2 cup): Melted butter incorporates faster and more evenly than cold butter, which saves you from overmixing.
- Granulated sugar (1 cup): This creates that signature crinkly surface when it caramelizes slightly during baking.
- Eggs, room temperature (2 large): Room temperature eggs blend more smoothly into the batter and create a better texture than cold ones straight from the fridge.
- Pure vanilla extract (1 tsp): A full teaspoon gives warmth to the chocolate without making it taste like vanilla cake.
- Semi-sweet chocolate chips or chunks (1/2 cup): I prefer chunks because they create little pockets of melted chocolate, but chips work just as well and are easier to scoop.
Instructions
- Set up your stage:
- Preheat your oven to 350°F and get your 24-cup mini muffin tin ready—either greased with butter or lined with paper liners. This takes two minutes and makes cleanup easier.
- Build the dry base:
- In a medium bowl, whisk together the flour, cocoa powder, baking powder, and salt until everything looks evenly mixed and there are no visible clumps of cocoa powder. This matters more than you'd think—unmixed cocoa powder creates bitter pockets in the finished bites.
- Cream the wet ingredients:
- In a large bowl, whisk the melted butter and sugar until they're completely combined and the mixture looks smooth, about one minute. Add your eggs one at a time, whisking well after each addition so they incorporate fully, then stir in the vanilla.
- Bring it together gently:
- Fold the dry ingredients into the wet mixture using a rubber spatula, stirring just until you don't see streaks of flour anymore—this usually takes about ten to fifteen gentle folds. Overmixing develops gluten and makes the bites tough, so stop as soon as everything is combined.
- Add the chocolate:
- Gently fold in your chocolate chips or chunks with just a few more folds, being careful not to crush them or overwork the batter.
- Fill the tin:
- Divide the batter evenly among the prepared cups, filling each about three-quarters full—a small ice cream scoop makes this step quick and consistent. If you overfill them, they'll rise and spill over the edges.
- Bake until set:
- Slide them into the oven for 12 to 15 minutes, checking at the 12-minute mark by gently pressing the top—it should feel mostly set, and a toothpick inserted into the center should come out with a few moist crumbs still clinging to it. This is the sweet spot; overbaking turns them cake-like and dry.
- Cool and rest:
- Let them cool in the pan for about ten minutes before carefully turning them out onto a wire rack to cool completely. If you turn them out too soon, they'll fall apart, but waiting too long makes them stick to the pan.
 Pin It
 I once made a batch and forgot to add vanilla, and honestly, they were still good, but they tasted flat and one-dimensional. Adding it back the next time made me realize how much a single teaspoon can change the whole character of something. It's one of those small moments in cooking that sticks with you.
Variations and Flavor Ideas
These brownie bites are a blank canvas, and I've experimented with them more than I probably should. Sometimes I swap out the semi-sweet chocolate for dark or milk chocolate depending on my mood—dark chocolate makes them more intense and less sweet, while milk chocolate softens everything and feels almost like a candy. Once I added a quarter teaspoon of espresso powder to the dry ingredients, and it deepened the chocolate flavor in a way that made everyone ask what the secret was.
Storage and Make-Ahead Tips
These keep beautifully in an airtight container at room temperature for up to four days, though I've never had any last that long. If you want to bake ahead, you can prepare the batter a few hours in advance and keep it covered in the fridge, then bake it when you're ready—just add a minute or two to the baking time since the batter will be cold. Freezing the baked bites works too; I've wrapped cooled ones in parchment and stored them in a freezer bag for up to two weeks, then let them thaw for an hour before serving.
Serving Suggestions and Pairings
I like serving these warm with a cold glass of milk or a cup of strong coffee, but they're equally good at room temperature tucked into a lunchbox or on a dessert plate. A light dusting of powdered sugar makes them look fancy without adding much work, and a quick drizzle of melted chocolate over the top feels indulgent. One trick I've picked up is serving them alongside a scoop of vanilla ice cream—the warmth of the brownie melts it just enough, and the cold cream balances the richness of the chocolate beautifully.
- Dust with powdered sugar for an elegant presentation.
- Pair with ice cream, whipped cream, or a hot beverage for a complete dessert moment.
- Pack them into containers for gifts or potlucks, and watch people light up when they bite into one.
 Pin It
 These brownie bites became my answer to the question of what to make when you want something that feels homemade but doesn't require hours in the kitchen. They remind me that the best recipes are the ones you return to again and again, not because they're complicated, but because they deliver exactly what you're craving every single time.
Recipe FAQs
- → What makes these chocolate bites fudgy?
-
The combination of melted butter, eggs, and cocoa powder creates a rich, moist texture that results in fudgy bites rather than cakey ones.
- → Can I add nuts to these chocolate bites?
-
Yes, folding in chopped walnuts or pecans adds a pleasant crunch and enhances the flavor.
- → How do I know when the bites are baked perfectly?
-
Look for a set top with a crackly surface and test with a toothpick—it should come out with a few moist crumbs, not wet batter.
- → Is it possible to substitute the chocolate chips?
-
Absolutely. You can use white or milk chocolate chips for a different flavor profile or chunks for varied texture.
- → How should I store these bites?
-
Keep them in an airtight container at room temperature for up to four days to maintain freshness.