 Pin It
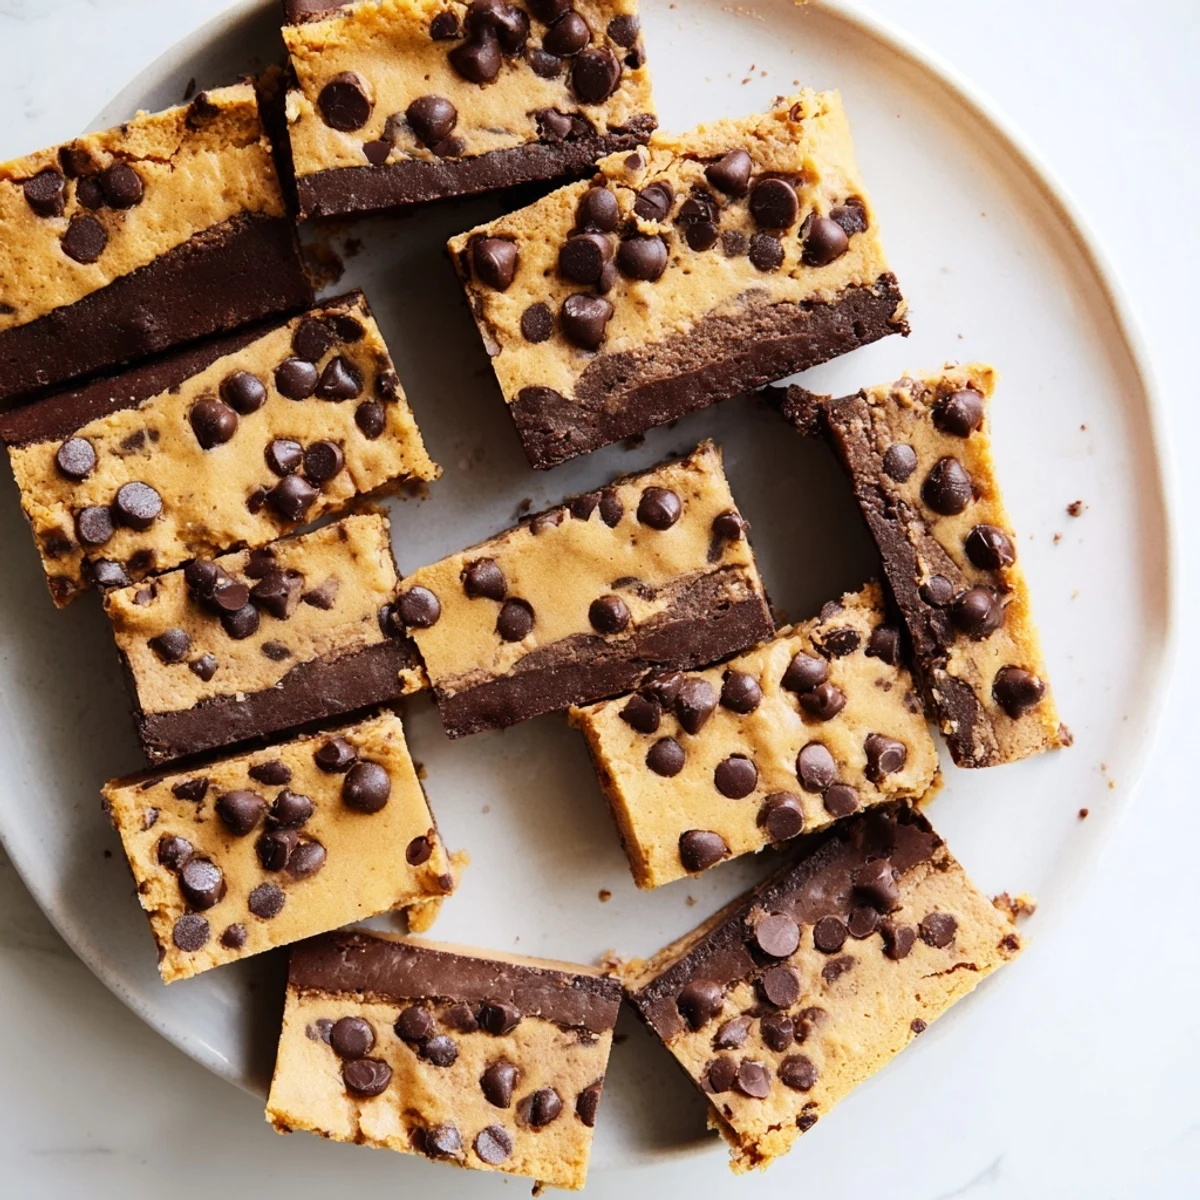
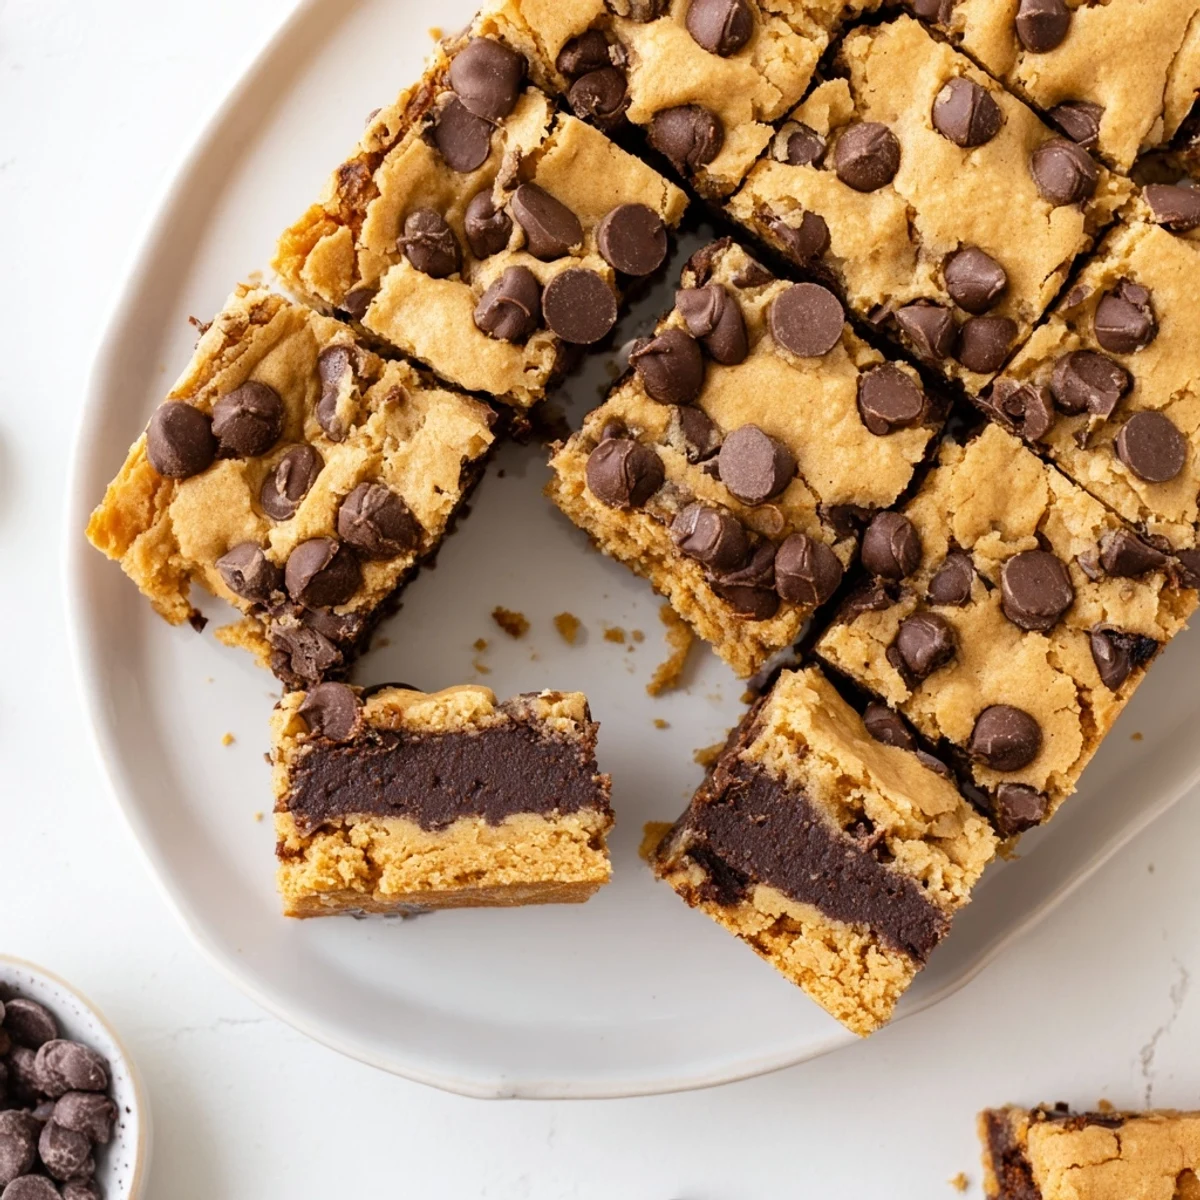
 These indulgent bars combine two beloved desserts into one irresistible treat. A rich, fudgy brownie base forms the foundation, topped with a layer of classic chocolate chip cookie dough. The result is a textural masterpiece—gooey, fudgy centers with crispy, golden edges and pockets of melted chocolate throughout.
Perfect for bake sales, potlucks, or satisfying intense dessert cravings, these bars come together in under an hour. The brownie layer provides deep chocolate intensity while the cookie topping adds buttery sweetness and satisfying chew. Serve them warm with vanilla ice cream for an unforgettable dessert experience.
The first time I made these, my roommate walked into the kitchen and asked if I'd started a bakery business. The smell alone is enough to stop traffic—fudgy brownie bottom meets that classic cookie-dough aroma, and suddenly everyone in the house mysteriously needs to check the oven. I've since learned to double the batch because one pan disappears faster than you can say "just one more square."
I brought a batch to a friend's birthday potluck last summer, and honestly, I felt a little guilty upstaging the birthday cake. Her dad cornered me by the dessert table asking for the recipe, while her mom kept sneaking "just one more" every time she thought nobody was watching. They're now my go-to when I need to make friends fast or recover from minor social disasters.
Ingredients
- Unsalted butter: Youll need both melted and softened versions, so room temperature butter makes this easier
- Granulated and brown sugar: The combo keeps both layers tender with that perfect crackly top
- Eggs: Large eggs bind everything together and create that rich, dense texture we're chasing
- Vanilla extract: Dont be shy with it—vanilla is what bridges the chocolate flavors between layers
- Unsweetened cocoa powder: Dutch processed gives the deepest chocolate flavor, but regular works perfectly fine
- All-purpose flour: Measured correctly, it creates structure without making things cakey or dry
- Salt: A crucial pinch that makes chocolate taste more like itself
- Baking soda: Just enough for the cookie layer to rise slightly while staying dense
- Semisweet chocolate chips: Swap for dark or milk chocolate depending on your mood that day
Instructions
- Get your oven ready:
- Preheat to 175°C (350°F) and line a 23 cm (9-inch) square pan with parchment paper, letting the edges hang over like a little sling for easy lifting later.
- Make the brownie base:
- Whisk melted butter with both sugars until blended, then beat in eggs and vanilla until everything looks silky smooth.
- Add the dry goods:
- Sift in cocoa, flour, and salt, folding gently until you cant see streaks of flour anymore—overmixing makes brownies tough, and nobody wants that.
- Spread it out:
- The brownie batter is thick, so take your time pressing it evenly into the pan bottom with a spatula.
- Start the cookie dough:
- In a separate bowl, cream softened butter with both sugars until fluffy and pale, then beat in the egg and vanilla.
- Combine cookie ingredients:
- Whisk flour, baking soda, and salt together, then gradually mix into the butter mixture just until combined.
- Add the chocolate:
- Fold in those chocolate chips until theyre distributed throughout the dough.
- Layer it up:
- Drop spoonfuls of cookie dough over the brownie layer and gently spread—its okay if some brownie peeks through, actually its better that way.
- Bake until perfect:
- 33 to 36 minutes usually does it, watching for that golden top and a toothpick coming out with moist crumbs, not wet batter.
- Patience pays off:
- Let them cool completely in the pan before lifting out—warm brownies are delicious, but they need to set before slicing into clean squares.
 Pin It
 My sister claimed she didn't like brownies until she tried these, which I took as a personal challenge to convert everyone I know. Now she requests them for every family gathering, birthday, and random Tuesday. There's something magical about watching someone take that first bite and suddenly understand why all the fuss.
Getting the Texture Right
The real secret is checking them at 33 minutes and every few minutes after—ovens run differently, and you want that sweet spot where the cookie layer is set but the brownie still feels fudgy. I've learned that toothpick test through the center tells the true story, even if the edges look done earlier.
Making Them Your Own
Sometimes I throw chopped walnuts into the cookie layer for that extra crunch, or swirl peanut butter on top before baking. The base recipe is solid enough to handle whatever mood you're in. Just keep the ratios similar and you can't go wrong.
Storage and Serving
These actually taste better the next day, if you can believe it—flavors meld and that brownie layer gets even fudgier. Store them in an airtight container at room temperature, though I've never had them last longer than 48 hours in my house.
- Warm individual squares in the microwave for 15 seconds before serving, with ice cream if you're feeling extra
- Freeze unbaked layers separately if you want fresh baked bars another week
- Cut them while slightly cool but not cold—the edges stay cleaner that way
 Pin It
 Hope these bring as much joy to your kitchen as they've brought to mine. Happy baking, friend.
Recipe FAQs
- → How do I know when these bars are done baking?
-
Insert a toothpick into the center—it should come out with a few moist crumbs but not wet batter. The edges should be slightly golden and set, while the center may still look slightly soft. This ensures a gooey texture without underbaking.
- → Can I make these ahead of time?
-
Absolutely. These bars actually taste better the next day as flavors develop. Store in an airtight container at room temperature for up to 3 days, or refrigerate for up to a week. Bring to room temperature before serving for the best texture.
- → What type of chocolate chips work best?
-
Semisweet chocolate chips provide a balanced sweetness that complements both layers. However, you can use dark chocolate for intensity, milk chocolate for a sweeter profile, or even mix in chunks of your favorite chocolate bar for varied melt pockets.
- → Why did my bars turn out cakey instead of fudgy?
-
Overmixing the brownie batter develops gluten, creating a cakey texture. Mix until just combined—some streaks of flour are okay. Also, avoid overbaking; remove from the oven when a toothpick shows moist crumbs rather than clean.
- → Can I freeze these bars?
-
Yes! Wrap individual bars in plastic wrap, then place in a freezer-safe bag for up to 3 months. Thaw overnight in the refrigerator or at room temperature for 2 hours. They're perfect to have on hand for sudden dessert cravings.
- → How should I cut these bars for clean slices?
-
Let them cool completely—at least 2 hours. For extra clean cuts, refrigerate for 30 minutes before slicing. Use a sharp knife wiped clean between cuts, or score the top first before pressing all the way through.