 Pin It
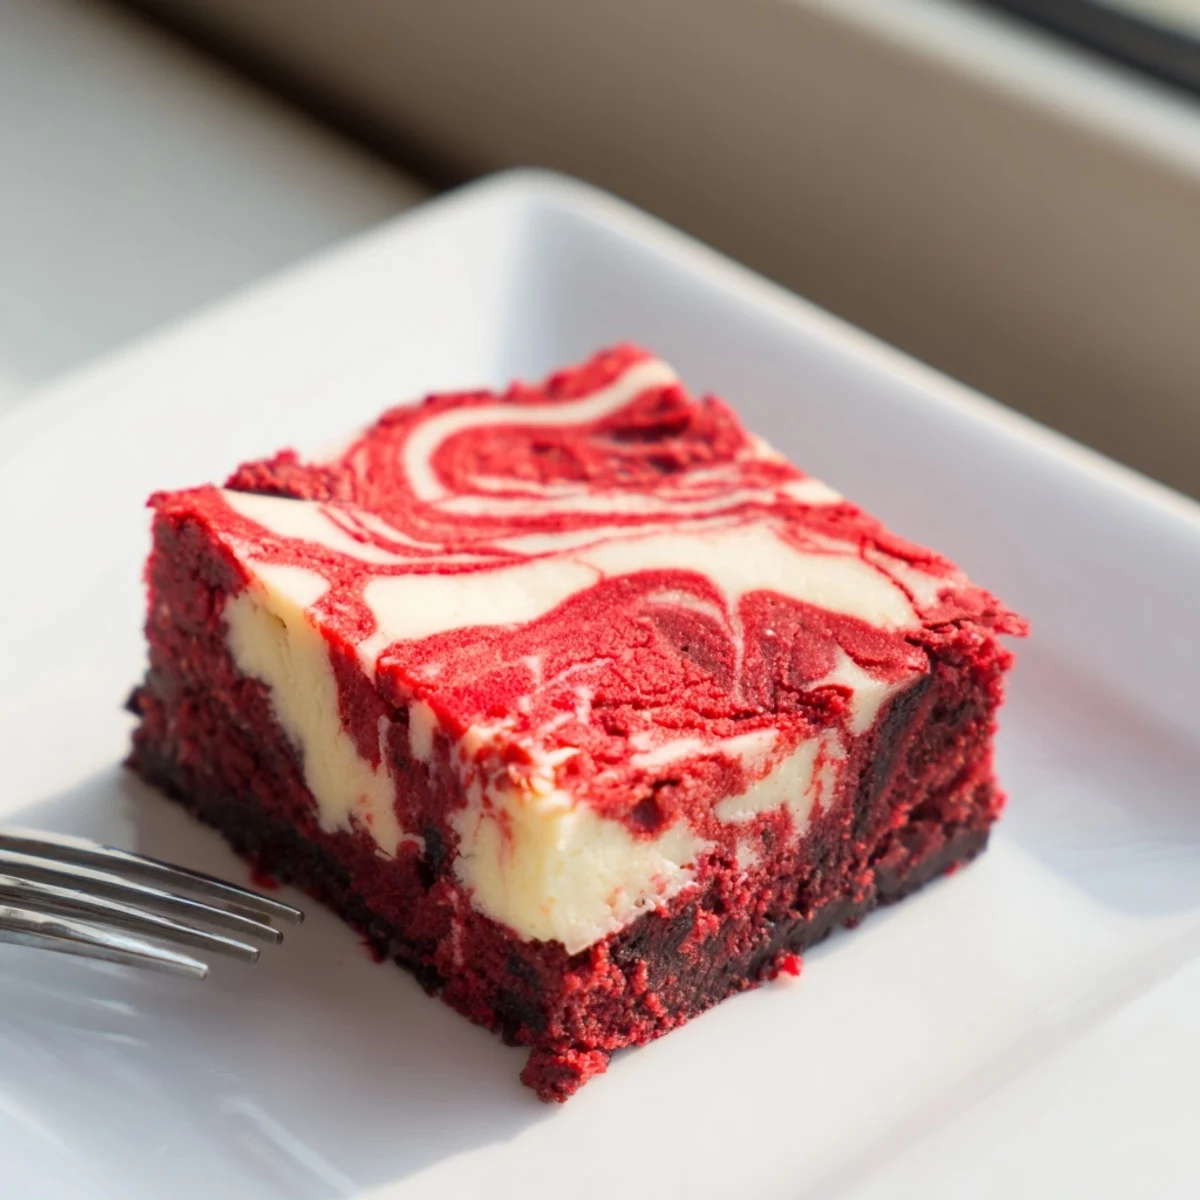
 These red velvet cheesecake brownies combine the best of both worlds—fudgy, cocoa-infused red velvet layers meet silky cream cheese swirls for an impressive marbled finish. The contrasting textures work beautifully: the dense, chocolatey base provides richness while the cheesecake topping adds a tangy creaminess that cuts through the sweetness.
Perfect for gatherings or special occasions, these brownies come together in just 55 minutes from start to finish. The vibrant red color and elegant swirling pattern make them visually striking, while the flavor profile balances deep chocolate notes with the subtle tang of cream cheese. They're equally delicious served chilled for a firmer bite or at room temperature for maximum fudginess.
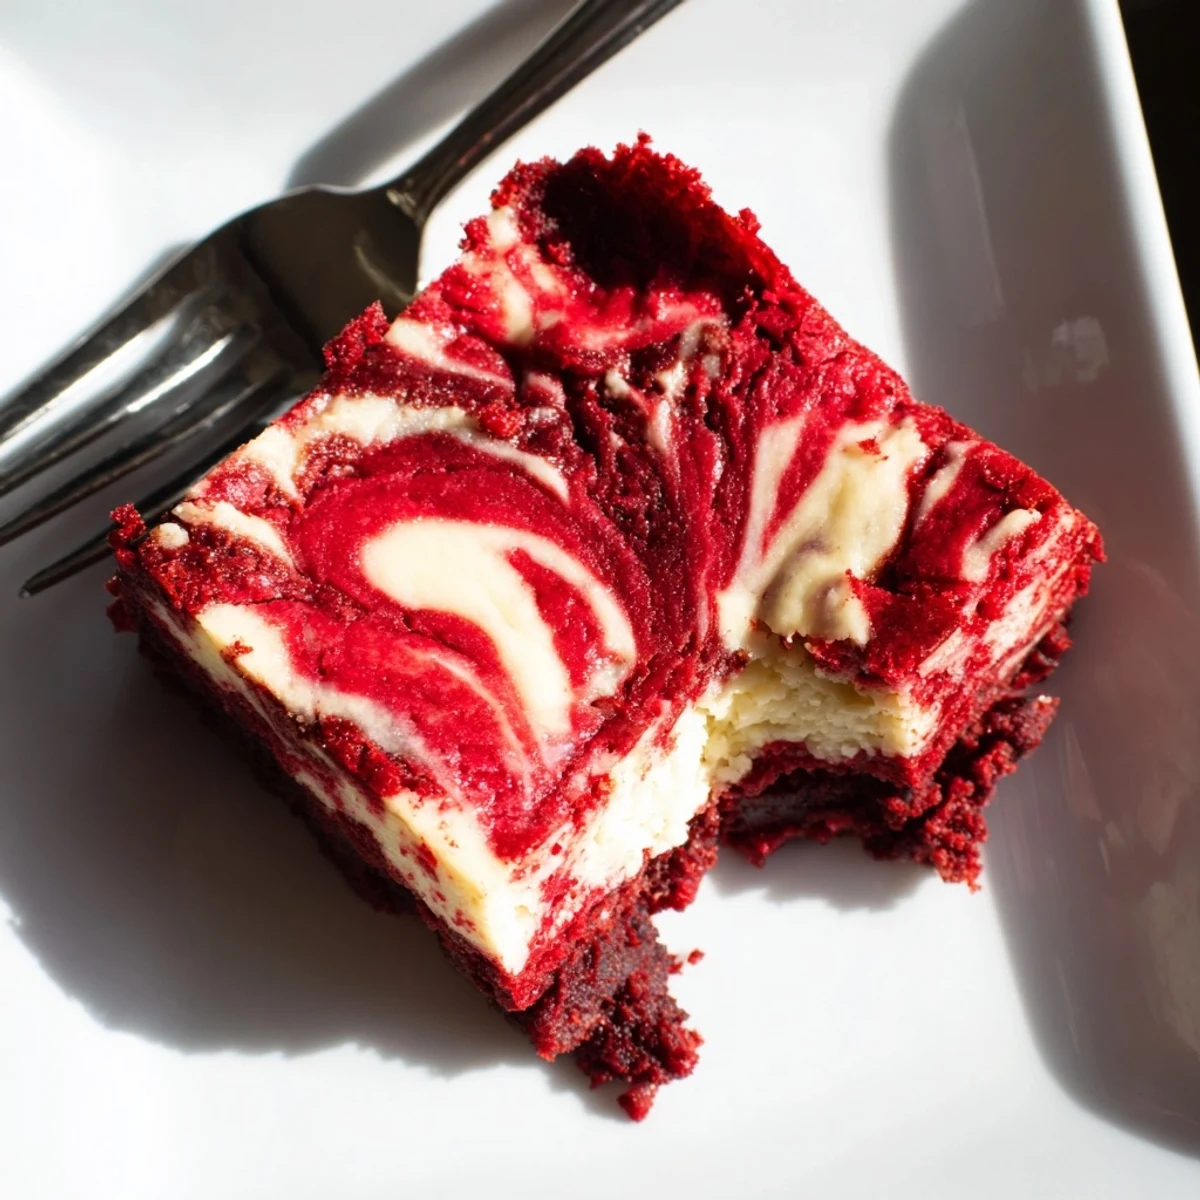
The first time I brought these to a dinner party, my friend Sarah actually gasped when I cut into the pan. That swirl of cream cheese against the deep red brownie looked like something from a bakery window, not my tiny apartment kitchen. Now they're my go-to when I need to impress someone without spending hours decorating.
My youngest daughter helped me make these for Valentine's Day one year, and she was so fascinated by how the red batter turned bright. She insisted these were special magic brownies and honestly, the way they disappear at parties, she might be right.
Ingredients
- Unsalted butter: Melt it completely so it incorporates smoothly into the sugar without leaving pockets
- Granulated sugar: This creates that crackly top we all love on brownies
- Large eggs: Room temperature eggs blend better and prevent the cheesecake layer from separating
- Red food coloring: Gel coloring gives a deeper red without adding excess liquid
- All purpose flour: Measure by weight if possible, too much flour makes these cakey instead of fudgy
- Unsweetened cocoa powder: Dutch processed gives a smoother, less acidic chocolate flavor
- Cream cheese: Truly let it soften to room temperature or you will have lumps in your swirl
Instructions
- Get your oven ready:
- Preheat to 350°F and line your pan with parchment, letting those ends hang over like handles
- Make the red velvet batter:
- Whisk the melted butter and sugar until you cannot feel the sugar grains anymore
- Add the wet ingredients:
- Pour in eggs, vanilla, and food coloring, whisking until the color is evenly distributed
- Fold in the dry ingredients:
- Sift the flour, cocoa, and salt into the bowl and gently fold until the streaks disappear
- Layer it up:
- Reserve just 1/4 cup of the red batter, spread the rest in your pan, and pour all that cream cheese mixture on top
- Create the swirl:
- Drop spoonfuls of reserved red batter over the cream cheese and drag a knife through in figure eights
- Bake until just set:
- The center should wobble slightly like Jell-O when you gently shake the pan
 Pin It
 These became my office birthday treat tradition after my coworker asked for the recipe three times in one month. Something about that combination of colors and flavors makes people feel celebrated.
Getting That Perfect Swirl
The trick is not overdoing it, three or four passes with your knife is plenty. I learned the hard way that too much swirling just makes everything look pink and muddy instead of that dramatic marbled effect.
Room Temperature Matters
Cold cream cheese will never blend into that silky smooth consistency you want. I set mine out on the counter before I even gather my other ingredients, giving it at least an hour to soften completely.
Storage Secrets
These actually taste better after a night in the fridge, where the flavors deepen and the texture becomes almost fudge like. I have learned to make them a day ahead whenever possible.
- Chill the pan for 30 minutes before cutting for the cleanest squares
- Use a hot knife, wiping it clean between each cut
- Layer parchment between stacked brownies so they do not stick together
 Pin It
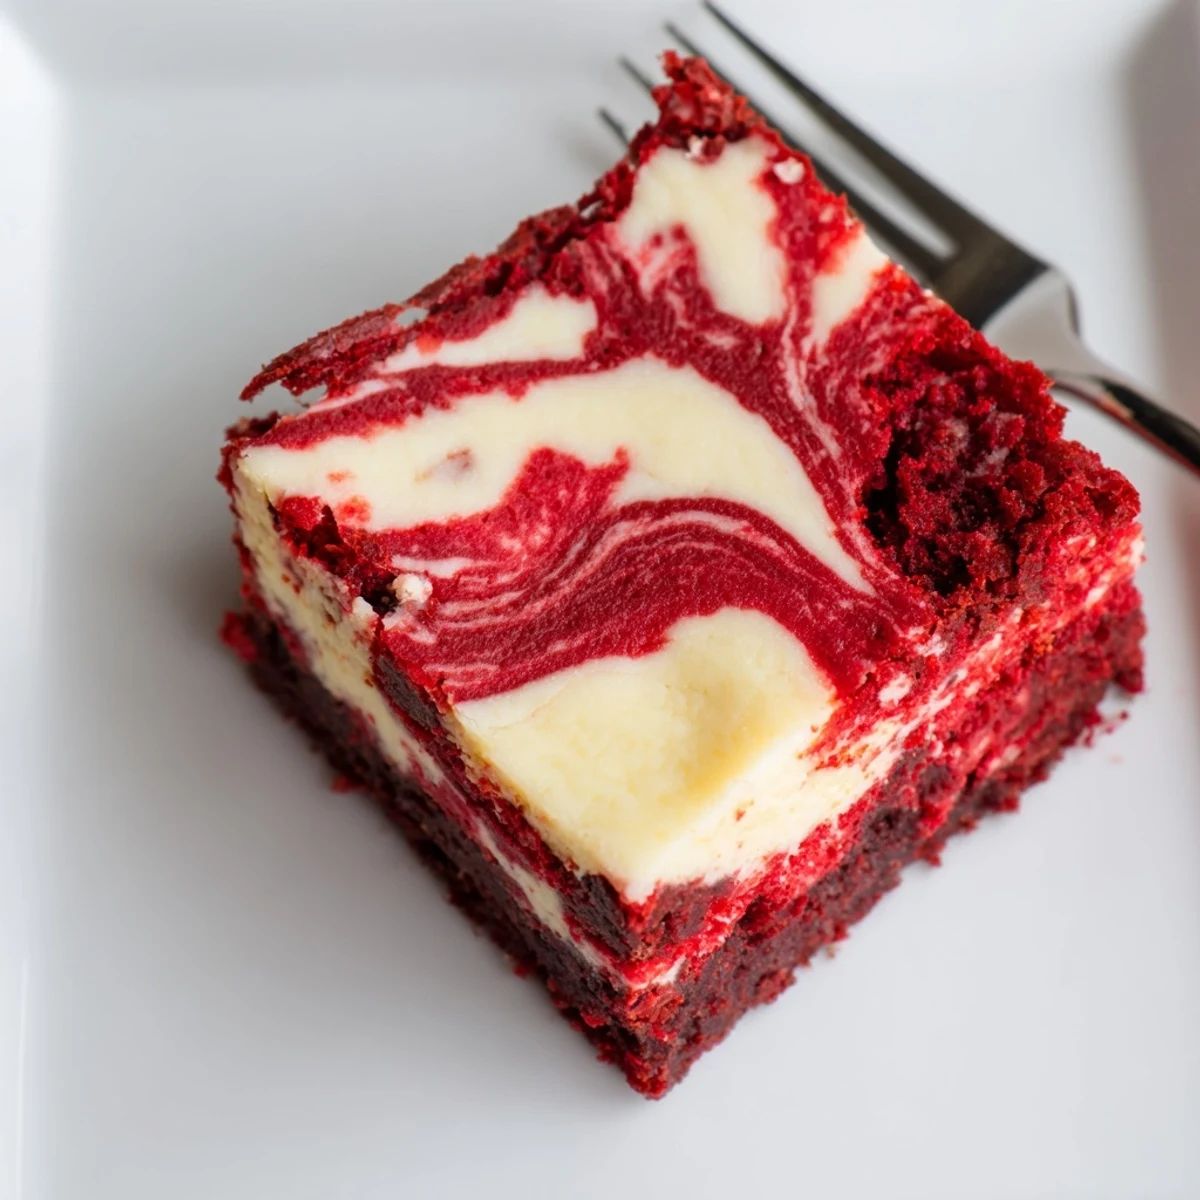
 There is something joyful about cutting into that first square and seeing the perfect spiral of red and cream. These brownies have a way of making ordinary Tuesday nights feel like a celebration.
Recipe FAQs
- → How do I know when the brownies are done baking?
-
Insert a toothpick into the center—it should come out with a few moist crumbs rather than wet batter. The edges should be slightly set while the center retains a slight jiggle. They'll continue firming as they cool.
- → Can I make these ahead of time?
-
Absolutely. These actually improve after chilling in the refrigerator for several hours or overnight. The flavors meld together beautifully, and the texture becomes perfectly fudgy. Store covered for up to 5 days.
- → Why did my cheesecake swirl sink into the batter?
-
This often happens if the red velvet batter is too thin or the cheesecake layer is too heavy. Ensure your cream cheese is softened but not melted, and avoid overmixing the brownie batter. Dropping the cheesecake mixture in dollops rather than pouring it helps maintain the swirl pattern.
- → Can I use natural food coloring instead of red dye?
-
Beet juice or pomegranate juice can work, though they may alter the flavor slightly and produce a more muted crimson hue. Gel food coloring provides the most vibrant red without adding excess liquid.
- → Should I serve these chilled or at room temperature?
-
Both ways are delicious. Chilled brownies have a denser, fudgier texture with a firmer cheesecake layer, while room temperature pieces are softer and more indulgent. Let chilled brownies sit for 10-15 minutes before serving for the best experience.
- → Can I freeze these brownies?
-
Yes, wrap individual squares tightly in plastic wrap and freeze for up to 3 months. Thaw overnight in the refrigerator or at room temperature for 2-3 hours. The texture remains remarkably good after freezing.