 Pin It
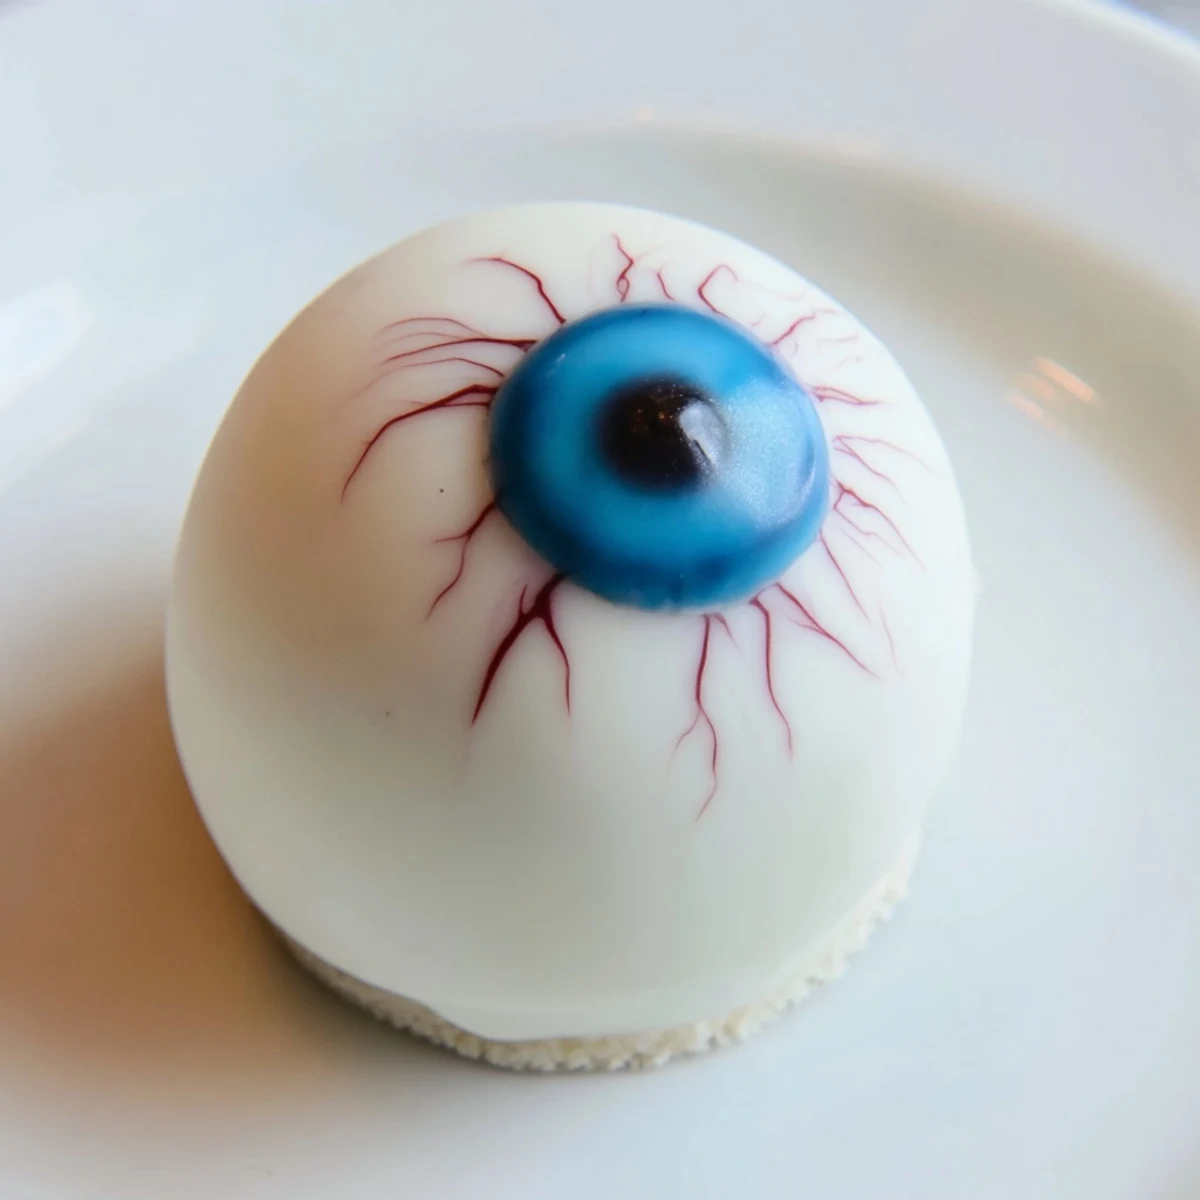
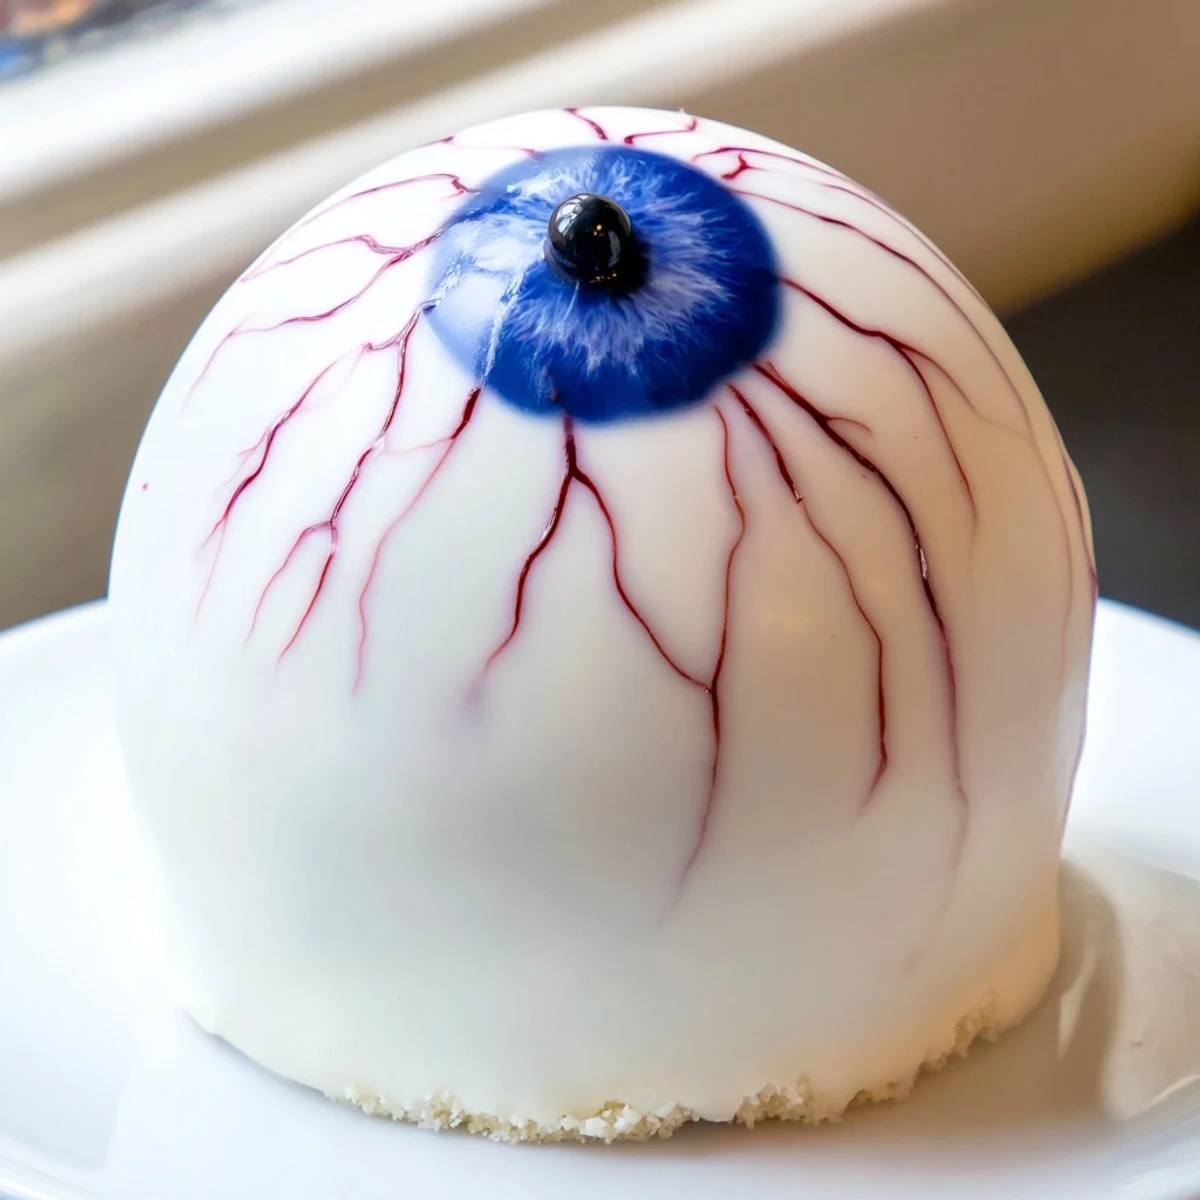
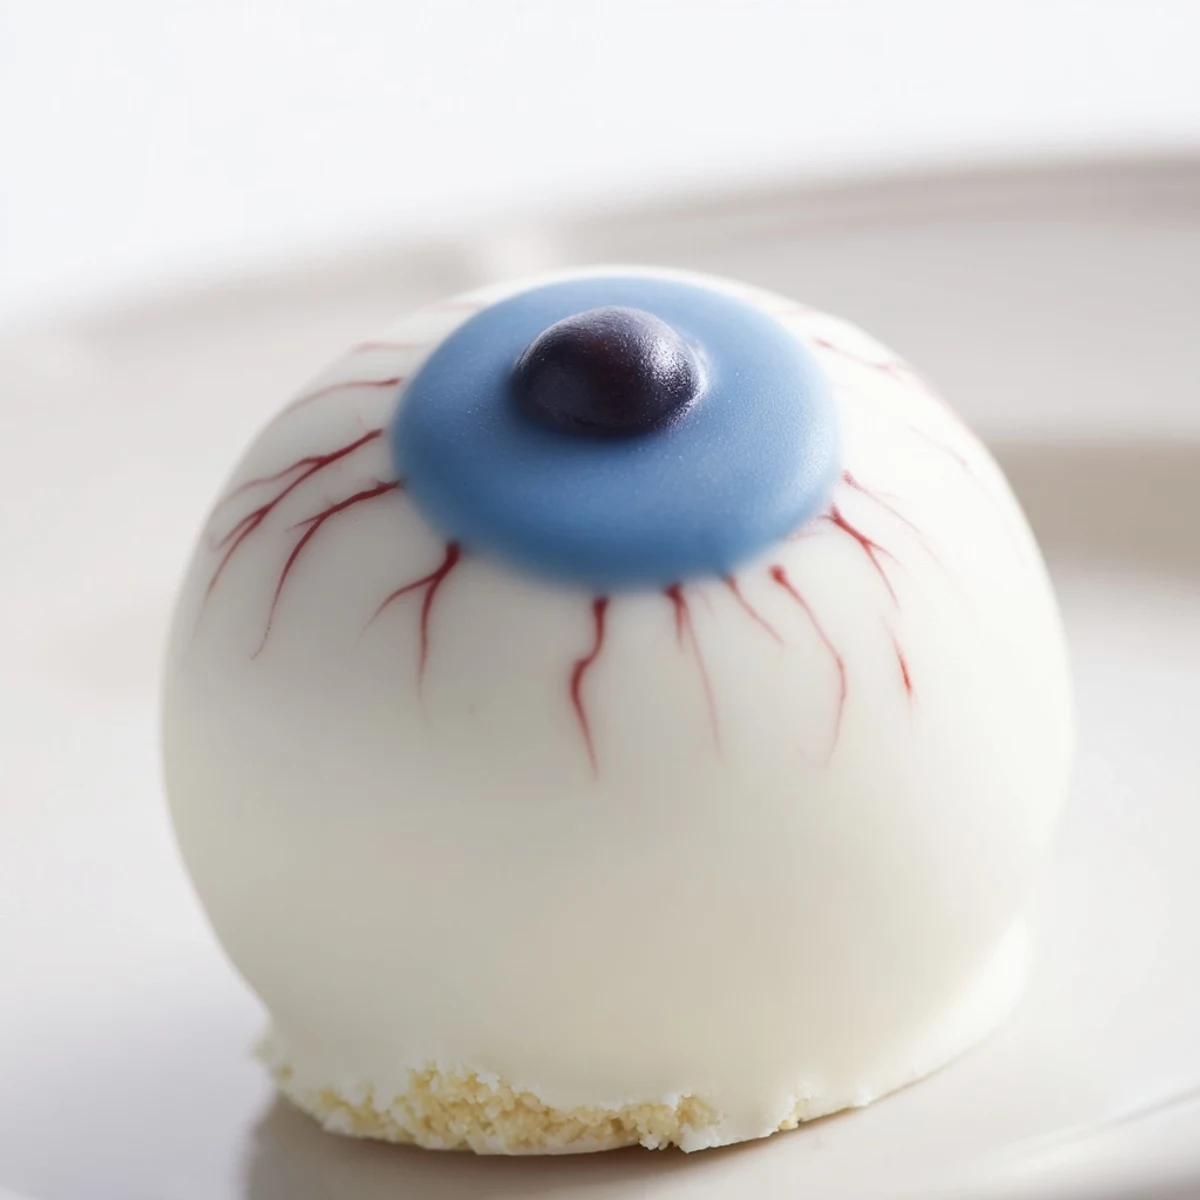
 These Halloween cake eyeballs transform classic vanilla cake into spooky party treats. Moist cake crumbs blend with cream cheese frosting, rolled into balls and dipped in white chocolate. Each eyeball gets a colorful iris made from candy melts, a dark chocolate pupil, and dramatic red gel veins for that authentic spooky look.
The process starts with baking or using prepared vanilla cake, which gets crumbled and mixed with a rich buttercream frosting. After chilling, the balls are dipped in melted white chocolate and decorated while the coating is still soft. The red gel veins add the finishing touch that makes these treats both adorable and eerie.
Perfect for Halloween gatherings, kids' parties, or as a fun weekend baking project. These eyeballs can be made ahead and stored in the refrigerator, staying firm and delicious for days. You can even add a surprise cherry jam center for a bloody effect.
The kitchen counter looked like a mad scientists laboratory that October afternoon, with bowls of colorful melted chocolate scattered everywhere. My youngest daughter had begged me to make something truly creepy for her class party, and these staring cake balls had caught her eye in a magazine. We ended up with chocolate smeared on our cheeks and blue food coloring on our noses, but the giggles made every mess worth it.
Last year I made three dozen for our neighborhood potluck and watched grown men hesitate before picking one up. The moment someone took that first bite and realized it was just moist vanilla cake with cream cheese frosting, the plate emptied in minutes. My neighbor actually asked if I could make them for her birthday next year just regular ones without the eyeballs.
Ingredients
- Vanilla cake mix (or homemade cake): The foundation needs to be moist and tender since we will be crumbling it anyway
- Large eggs: Room temperature eggs blend better with the other ingredients
- Cream cheese: Make sure it is properly softened or you will get lumpy frosting
- Unsalted butter: Softened butter creates that silky smooth texture we want
- Powdered sugar: This sweetens and stabilizes the frosting mixture
- Vanilla extract: Pure vanilla makes everything taste homemade
- White chocolate or candy melts: These coat the cake balls smoothly and set firm
- Dark chocolate or black candy melts: For those dramatic pupils that stare back
- Blue or green candy melts: The colored iris makes the eyeballs look disturbingly realistic
- Red gel food coloring: This creates the spooky veined effect that sells the whole look
Instructions
- Bake your cake:
- Preheat your oven to 180°C and prepare the vanilla cake according to package or homemade recipe directions. Let it cool completely before touching it or the crumbs will not form properly.
- Create fine crumbs:
- Break the cooled cake into small pieces then use your hands to crumble it until you have fine, uniform crumbs throughout the bowl.
- Make the creamy frosting:
- Beat together the softened cream cheese, butter, powdered sugar, and vanilla extract until completely smooth and no lumps remain.
- Combine everything:
- Pour the frosting over the cake crumbs and mix with your hands until the mixture holds together when you press it.
- Form the eyeballs:
- Scoop out tablespoons of the mixture and roll them into 24 smooth balls. Place them on a parchment lined tray and freeze for 20 minutes so they are firm enough to dip.
- Coat with white chocolate:
- Melt the white chocolate gently then dip each cake ball in, letting excess drip off before placing back on the tray.
- Add the colored iris:
- While the white coating is still soft, pipe or dip a small amount of blue or green candy melt onto the center of each ball.
- Create pupils:
- Once the iris has set, add a small dot of dark chocolate or black candy melt in the center for that staring effect.
- Draw spooky veins:
- Use red gel food coloring to draw little veins radiating from the colored iris toward the edge of each eyeball.
- Let them set completely:
- Allow all the decorations to firm up before serving or storing, which takes about 15 to 20 minutes.
 Pin It
 My daughter insisted on taking pictures of every single eyeball we made that first year, lining them up on the windowsill like strange little creatures. Now it is become our October tradition, the one thing she asks for as soon as the calendar flips to fall.
Getting The Creepy Factor Right
The veins make all the difference between cute and genuinely unsettling. Practice a few times on parchment first because red gel can be tricky to control once you start on the actual eyeballs.
Making Them Ahead
These actually taste better after chilling overnight in the refrigerator. The flavors meld together and the coating firms up nicely, making them easier to transport to parties.
Ways To Switch Things Up
Use red velvet cake instead of vanilla for an even creepier effect when you bite into them. You could also add a small cherry jam center for that bloody surprise element that kids absolutely love at Halloween parties.
- Try using different colored irises for variety
- Make tiny ones for mini desserts or large ones for a dramatic centerpiece
- Keep them chilled until serving time for the best texture
 Pin It
 Hope these spooky treats make your Halloween gathering unforgettable. Happy haunting.
Recipe FAQs
- → How far in advance can I make Halloween cake eyeballs?
-
These cake eyeballs can be prepared up to 3 days in advance. Store them in an airtight container in the refrigerator to maintain freshness and keep the chocolate coating firm. The red gel veins may soften slightly over time, so add them as close to serving as possible for the spookiest appearance.
- → Can I use different cake flavors besides vanilla?
-
Absolutely. Chocolate cake works exceptionally well, creating darker eyeballs that look even more dramatic. Red velvet cake provides a bloody effect when you bite into them. Lemon or orange cake add a surprising citrus twist that pairs nicely with the white chocolate coating.
- → What if I don't have candy melts for decoration?
-
You can substitute candy melts with standard baking chocolate. For the colored iris, use tinted white chocolate or frosting. Dark chocolate chips work perfectly for pupils. The red gel can be replaced with red food coloring mixed with a bit of corn syrup for the veining effect.
- → Why do my cake balls fall apart when dipping?
-
This usually happens when the mixture is too dry or hasn't chilled long enough. Ensure your cake-to-frosting ratio creates a dough-like consistency that holds together when squeezed. The 20-minute freezer chilling step is crucial—skip it and the balls may crumble in the warm chocolate.
- → Can I make these without a stand mixer?
-
Yes, you can mix the frosting by hand with a sturdy spoon or whisk, though it will take more effort. For crumbling the cake, simply use clean hands to break it apart into fine crumbs. The cake ball mixture comes together easily with hand mixing—no special equipment required.
- → How do I transport cake eyeballs to a party?
-
Place the finished eyeballs in a single layer in a rigid container lined with parchment paper. Stack layers with wax paper between them. Keep them refrigerated until ready to transport, then use a cooler or insulated bag to maintain temperature during travel.